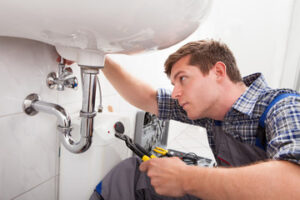
When you think of plumbing, you probably picture sinks, showers and toilets. But plumbing is more than just fixtures; it’s a network of pipes that bring clean water into homes and carry waste water away.
Bryco Plumbing codes govern installation standards, material use and other aspects to ensure safe and efficient systems. Read on to learn more about this fascinating trade.
Faucets of all types are meant to last for years, but there are maintenance (worn protective coatings on the handles), environmental (hard water and build-up of corrosion) and use (forcing the handle to move too hard) issues that can shorten their lifespan. There are usually clear signs that a faucet needs to be replaced, including a noticeable leak or the handle not working anymore.
If the leak is from the handle, it is typically due to a worn out O-ring. The O-ring creates a seal between the handle and the valve or cartridge. Replacing the O-ring is an easy fix, but it must be done correctly to prevent future leaks. The first step is to shut off the water supply. Then, remove the handle by unscrewing a screw that secures it to the faucet. It is also possible to unscrew the decorative cap to expose a screw that will allow you to access the valve assembly. Once the handle is removed, you can access the cartridge assembly to replace the O-ring or a washer. Once you have replaced the O-ring, reassemble the handle and reinstall the decorative cap.
Before replacing the valve seat washer, make sure that you have cleaned out any mineral deposits and that the original seat is not pitted or damaged. Once you have sanded down the washer, remove the old one and install the new one with a nontoxic plumber’s grease. You should also replace the retainer ring, as it can be a common source of leaks.
After installing the replacement seat washer, reassemble the entire faucet, including the handle. If you have an older faucet, you will need to remove the tube that connects the supply line to the valve. This tubing is typically 3/8 inch in diameter, but if it has been installed for a long time, it may be larger or smaller.
Reinstall the tubing, if needed. Reconnect the supply lines, turning on the hot and cold water to flush out the line and to check that the connections are tight and that there are no leaks. Replace the decorative cap and turn the water back on.
Repairing the Valve
A valve is a mechanical device with a small flap that opens and closes, allowing water or sewage to flow through your pipes. A valve might need repair or replacement if it leaks, rusts or doesn’t work properly. Inside the valve are a series of mechanisms that open and close the flap as needed.
Water valves are generally located 3 to 5 feet away from where the water main enters the house. Most are in the basement or near the water heater or furnace. If yours doesn’t operate properly, a plumber can usually fix the problem.
If your home’s water pipes are old or corroded, replacing the valve is a smart move. Older valves are prone to clogging and often break or fail. Newer quarter-turn valves are made of durable materials and rarely lock up or leak. They also cost less to operate. Depending on your pipe type and installation method, you might need to remove the tubing connected to the valve or the faucet before installing a new one.
When replacing a valve, use an adjustable wrench to loosen the nuts connecting the supply line to the valve or the sink’s faucet. If there’s a lot of sediment in the pipe threads, use a tool called a sleeve puller to remove it. You might also need to sand off any remaining solder and clean the tubing before installing the new valve.
Before removing or installing a valve, make sure the water is shut off and the pipes are drained. You should also have a bucket or towels handy to catch any residual water in the pipes.
Inspect the Valve Handle Operation
Close the valve and gently turn the handle to gauge its ease of operation. Difficulty turning or unusual noises indicate that the valve may need repairs or replacement. Also, observe for dripping when the valve is closed. If the valve continues to drip, you might need to replace its valve seat or seal.
Unless you’re comfortable working with your home’s plumbing system, you should always call in a professional when you need to replace a valve or install a new one. Cutting into an existing pipe, creating threads and sealing the valve requires skill and experience that many DIYers don’t have. Damaging your pipes in this process can lead to costly problems down the road.
Repairing the Cartridge
Cartridge faucets usually require disassembly and cleaning to repair problems. The exact steps vary among models, but most involve shutting off the water and relieving the pressure before beginning work. Most cartridges have a threaded retaining clip that can be removed by gripping it with needle-nose pliers and twisting. Some replacement kits include a plastic tool with a square top, which you place on the cartridge and line up with notches or tabs in the headshell to loosen it. If your kit doesn’t include a spanner cap, you can buy one for a few bucks at most hardware stores and home centers. Once the cartridge is loose, remove it by grabbing it firmly at its top and pulling straight up. Some water will come with the cartridge, but that’s normal.
If the cartridge is in good shape, sanitize it by soaking in vinegar. If the rubber O-rings are worn, rub them with heatproof silicone plumber’s grease to ensure a tight seal when reinstalling the cartridge. The installation of the new cartridge is similar to the removal, but note the orientation of the cartridge in the headshell (it may be oriented so that hot and cold are reversed) so you can replace it oriented correctly.
Shut off the water at the valves that control your shower and bath fixtures, if necessary. Turn off the main water valves in your house, too, to prevent water damage if you can’t find the dedicated shutoffs for each fixture.