The roof is a vital part of your home that protects you and your belongings from scorching sun, torrential rain, snowfall, and gusty winds. When your roof is damaged, it needs to be repaired as soon as possible to prevent extensive damage and unforeseen costs.
Frequently checking and fixing flashing issues (flashing is used around chimneys and pipes to direct water away from the roof) will prevent leaks. Specialty repairs may include resealing or replacing skylights. Contact Roof Repair Near Me for professional help.
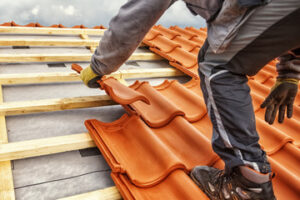
A cracked tile might seem like a minor problem, but it’s not. Even a small crack allows water to leak through, which can lead to wood rot and mold growth inside your home. Additionally, water can reach electrical wiring or appliances, which can cause expensive damage or fires. In addition, the Insurance Information Institute reports that water damage is one of the most common homeowner’s insurance claims. A roof repair company can easily replace the affected tiles, saving you money and preventing major problems later on.
If you notice a damaged shingle or tile, it’s important to take action quickly to avoid costly damage. A quick fix can keep your home safe, prevent water leaks, and keep your homeowner’s insurance valid. Additionally, a well-maintained roof can help you save on utility bills by improving insulation.
Depending on the type of shingles or tiles, there are several options for repairing them. If the shingle is simply cracked or torn, it can usually be repaired by applying roofing sealant to the affected area. To do this, squeeze a generous bead of sealant under the cracked or torn shingle and then press down on it gently. After the shingle is fully seated, apply another layer of sealant over it to reinforce the waterproofing.
Another option is to replace the damaged shingle or tile with a new one. However, this is typically only an option when the damage is isolated to a few tiles or shingles. This is because a new shingle will not blend in with the existing ones, and it can be difficult to match the color of the new shingle to the old ones.
If a large portion of your roof is damaged, it may be time to consider replacing it altogether. This will likely be cheaper than trying to repair every individual broken tile or shingle, and it can make your home look much more aesthetically pleasing. Additionally, a new roof will also improve your home’s value and can increase energy efficiency. As a result, a new roof will pay for itself over time by saving you on your utility bills.
Leaking Gutters
Gutters are a vital part of a well-functioning roof system, helping to direct water from the roof and away from the home’s foundation. But over time, a poorly functioning gutter can cause a range of problems including a musty smell, mold and mildew growth and damage to walls, sidewalks, driveways and siding. Keeping up with gutter cleaning and repair can ensure that your gutters are working as they should.
Leaking gutters are often the result of a clogged system, as leaves, twigs and other debris can block the flow of rainwater, forcing it to seep over the sides of the gutter. If left untreated, this can lead to structural damage to the home, soil erosion and basement flooding.
Gutter leaks are also commonly caused by metal corrosion, particularly in the joints. In these cases, the joint area needs to be cleaned, sanded and re-sealed. Silicone caulking is typically best for this job, but it’s important to make sure that the gutters are clean and dry before applying the caulk.
Plastic gutters are less prone to corrosion, but they can still develop leaks in the joints where they connect with downpipes. These leaks are often difficult to fix because the gutters will need to be removed in order to access the joints, but it’s worth having a professional take a look at your gutters and downpipes to make sure that they are securely fastened and that there are no areas where water could escape.
If your gutters are leaking, it’s important to get them fixed right away. Not only can this cause structural damage to your home, but it can also create conditions for the growth of mold and mildew which can affect the health and safety of your family. Leaking gutters can also lead to water damage to the foundation of your house, which is expensive and inconvenient to fix. The sooner you catch a leak, the easier and cheaper it will be to fix. A good time to check your gutters for clogs and leaks is after a big storm, when any debris that has been swept up can be found.
Missing Shingles
A roof’s most essential component is shingles. These rectangular pieces of asphalt-coated material deflect sunlight, guard against debris, and protect homes from harsh weather conditions. If shingles are damaged or go missing, it’s important to address the issue promptly with a professional. If not, water infiltration and structural damage can ensue.
The good news is that a few missing shingles don’t usually require an entire roof replacement. However, homeowners should take the time to give their roofs a visual inspection after each major storm and look up from certain windows or with binoculars to check for empty spots where shingles are supposed to be and seriously bent or loose shingles.
If you notice a missing shingle, it’s important to note whether it was blown off by a strong wind or came off due to faulty installation. There’s a good chance that the shingle was directly above an open seam between two other shingles, which means a leak will start soon enough. But it’s also possible that the shingle was missing due to a problem with the wood substrate, like rotting sheathing or improper nailing patterns from the time of the original installation.
Once a shingle is exposed, it will attract water and heat which may lead to mold growth and water stains in your home’s interior. It can also allow moisture to penetrate deeper into the roof deck and cause sagging, leaks, wood rot, and pest infestations.
Aside from leaks, a lack of shingles can compromise your roof’s energy efficiency and affect your home’s temperature. This is because the shingles are designed to keep out cold air and hot air, and without them, you’ll have a harder time regulating your home’s temperature.
It’s a good idea to replace the shingle in question with the same type and style of shingle it was originally installed with. It’s important that you don’t use a different color or style, as this will throw off the look of your roof. And don’t forget to check the areas surrounding the missing shingle for signs of wear and tear, or water penetration problems.
Hail Damage
Hail storms wreak a lot of havoc, especially on roofs. Whether it’s cosmetic or functional damage, addressing hail-related issues promptly is key to keeping your property in good shape and preventing long-term problems. The most obvious signs of hail damage are dents, divots, and bruised or cracked shingles. But hail can also cause damage to gutters, flashing, chimneys, and windows.
The best way to know if you have hail damage is to conduct a ground inspection on your home and property. Look for impact marks on your roof and siding, dents in the metal of gutter downspouts or vents, and areas that are darker than surrounding areas or paint. You can also use the side of a standard chalk to test for dings and dents on soft surfaces, such as shingles or your car. If the chalk is colored, it’s likely hail has hit and impacted that area.
Different roofing materials respond to hail differently, too. Asphalt and composition shingles show dents and cracks, while wood shingles may exhibit dark splotches or splits. It’s important to assess and document all visible damage before contacting a professional for repair.
When hiring a roof repair service, it’s important to choose a professional contractor with the right experience and expertise for your needs. Look for a company with verifiable credentials, an excellent reputation, and extensive knowledge of roofing and hail damage. Inquire about the contractor’s process for assessing roof repair needs, including timeframes and costs, as well as how they will perform the work.
A roof repair specialist can help you determine the extent of the damage, recommend the appropriate course of action, and assist with insurance claims. They can provide temporary solutions, such as tarping and board-up services, to protect your property until repairs can be completed. They can also recommend preventative measures, such as installing impact-resistant shingles, to mitigate future hail damage. Lastly, they can advise you on steps to take to prepare for storms, such as moving vehicles and outdoor furniture to sheltered areas. This will help to minimize the risk of damage and minimize the need for costly repair or replacement.